Dried Flower Bouquet
When we receive a bouquet of flowers, we feel very happy; however, after a week, or even two weeks, they may turn yellow and wither and have to be thrown away.
How to make it last long? We need to make it into dried flowers, preserving the original colour and fragrance. Tools needed: flowers, scissors, and small clips. First stage: Receive the flower, add nutrients and insert it in water when it is fresh and has ornamental value.
In the second stage, keep it in a cool and ventilated place for about a week. We kept it for two weeks in the north, where the temperature is low, during which the roots were regularly trimmed and watered, and the roots were cut at an angle of 45 degrees.
Half a month later, the flowers are slightly tired, and some of the early blooming petals fell off when touched. We need to pour out the water and officially start making dried flowers.
First of all, there are two cases, whether to make a whole dried flower or to make dried petals, the former can be an artistic flower arrangement, the latter can be a scented bag, and so on. We had more flowers and did both in two parts.
Whole dried flowers: we use toilet paper or a dry towel or something to dry the water on the flower rod, and then find some clips that will be upside down flowers clamped on the clothesline, which must be in a cool and ventilated place.
Exposure to the sun will affect the colour of the flower, ventilation can make it dry faster. Then just leave it alone.
Dried petals: find a table that is not much used, wipe it clean, and do not have the wind (will blow to the ground ah hello), while the flowers are a little tired to pick off all, preferably not yet appear yellow edge, and then a petal spread out on the table to dry.
We can't pick a bunch and then scatter them, it's easy to damage the petals, and the petals are rotten and easy to turn yellow. Try not to overlap, a separate petal is easy to keep the prototype easy to dry, and even if it is bad is not easy to infect other flowers.
Dried flowers are flowers that have been dried to retain most of their form and colour, and have a distinctive vintage look. Here we will introduce the four methods of making dried flowers that can be done at home.
1. The upside-down method is the most common method of air-drying flowers, and it is so easy that everyone can do it on their own. You can use the dying flowers left behind in your daily flower arrangement, hang them upside down in a cool and ventilated place, and let them dry naturally.
2. The flat method is to lay the flowers directly on a shallow tray or dry paper for air drying.
Applicable flower materials: The flat method is suitable for air-drying small flower materials with thin stems, and rose heads or petals without stems can be air-dried using the flat method.
It is especially suitable for drying fruit materials such as pine cones, rosettes, etc. that have no stems and are not easily deformed. In addition to pine cones, peppers and fruit slices can also be air-dried as flower material.
3. Direct insertion method
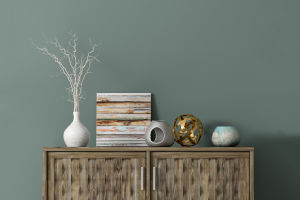
The direct insertion method is a method of inserting flower materials directly into a vase and waiting for natural air drying. The vase can be used as decoration, and the flowers can continue to be placed for a long time after drying.
The steps of the straight method
1. Choose the flower material suitable for straight arrangement and insert it evenly in the vase.
2. Remove excess branches and leaves to avoid too dense overlap.
3. Avoid direct sunlight and wait for natural drying.
If you find that the flowers are already bent, it is better to choose the upside-down method to keep the flowers straight.